Appointments User Guide
Overview
The Appointments page is your comprehensive scheduler for managing patient appointments. View appointments in calendar or grid format, create new appointments, track appointment details, and coordinate provider schedules efficiently.
Purpose:
- Schedule patient appointments with providers
- View appointments in multiple calendar formats
- Track appointment status and details
- Manage provider availability
- Coordinate multi-location schedules
- Send automated reminders
Accessing Appointments
Global Appointments View
- Click Appointments in the main navigation menu
- The appointments calendar displays showing all appointments
Case File Appointments View
- Navigate to a specific case file (File Hub)
- Click the Appointments tab/section
- See appointments for that case file only
The interface is context-aware and changes behavior based on whether you're viewing all appointments or case-specific appointments.
View Modes
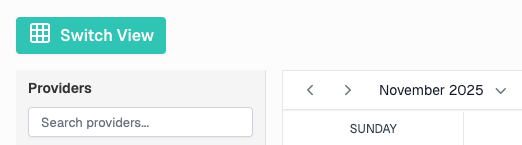
Switching Between Views
Toggle Button: Located in the top-right corner
- Calendar Icon - Switch to calendar view
- Grid Icon - Switch to grid/list view
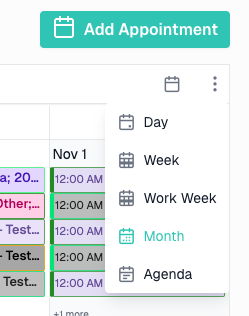
Calendar View
Available Calendar Formats
Use the toolbar dropdown to switch between calendar views:
| View | Description | Best For |
|---|---|---|
| Day | Single day with hourly time slots | Detailed day planning |
| Week | 7-day view with hourly time slots | Weekly scheduling |
| Work Week | Monday-Friday with hourly time slots | Business week planning |
| Month | Full month with daily cells | Long-term overview |
| Agenda | List view of upcoming appointments | Quick appointment list |
Default View: Month
Calendar Features
Color Coding:
- Appointments are color-coded by provider (if feature enabled)
- Visual distinction helps identify provider schedules quickly
Hover Tooltips:
- Hover over an appointment to see quick details
- Title, patient name, date/time, location, and notes
Quick Info Popup:
- Click an appointment to open quick info popup
- View summary details
- Click Copy Details to copy appointment info to clipboard
- Click Edit to modify appointment (case file view only)
- Click Delete to remove appointment (case file view only)
Navigation:
- Use Previous/Next arrows to change dates
- Use Today button to return to current date
- Use calendar dropdown to jump to specific date

Creating Appointments from Calendar
Method 1: Double-Click on Time Slot
In Case File View:
- Double-click any time slot on the calendar
- Appointment form opens immediately
- Case file is pre-selected
- Selected date/time is pre-filled
- Duration defaults to 1 hour
Method 2: Add Button (Global View Only)
- Click Add Appointment button in toolbar
- Select case file from dropdown
- Click Continue to open appointment form
Copy Appointment Details
Purpose: Quickly copy appointment information to share, reference, or use as a template for new appointments
How to Use:
- Click an appointment to open quick info popup
- Click Copy Details button
- Appointment details copied to clipboard
- Paste into email, notes, or other applications
Creating a New Appointment from Copied Details:
You can also use Copy Details to quickly create a similar appointment without re-entering all information:
- Click an existing appointment to open quick info popup
- Click Copy Details button
- Click Add to create a new appointment
- The new appointment form auto-loads the copied details
- Edit any fields as needed (e.g., change date/time)
- Submit the new appointment
This is especially useful for scheduling follow-up appointments with the same provider and location.
Information Copied:
- Title/Subject
- Case file number
- Patient name
- Start and end date/time
- Location
- Modality
- Provider
- Procedure
- Appointment type
- Status
- Notes
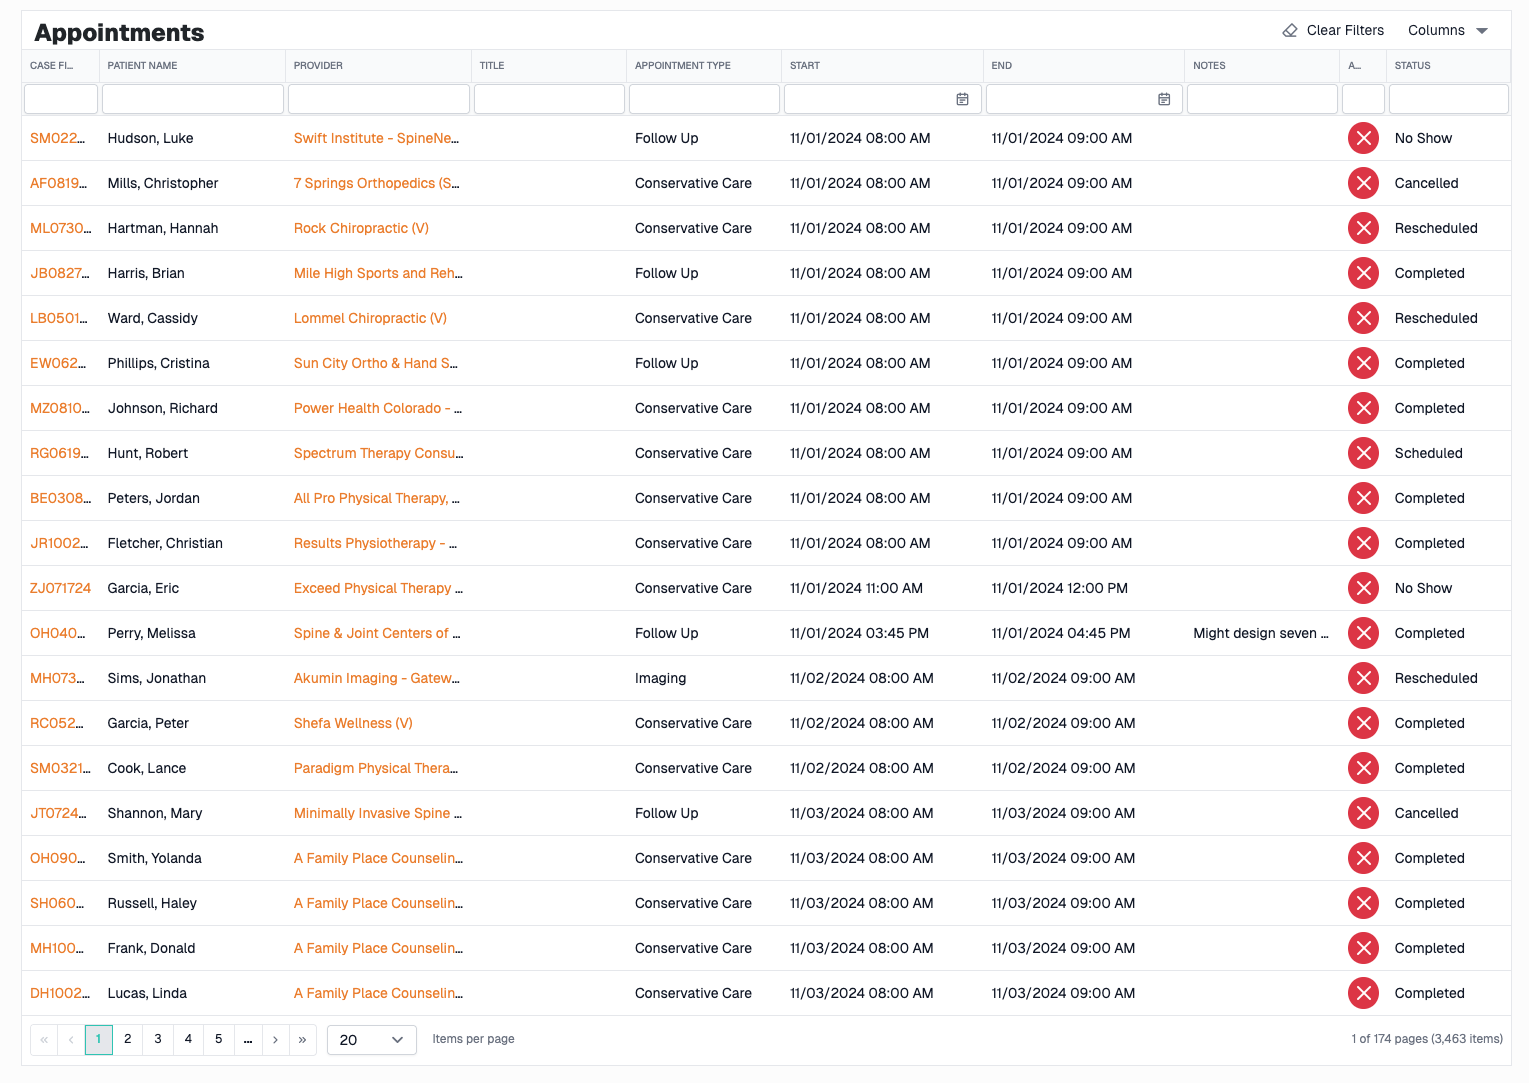
Grid View
Grid Columns
| Column | Description |
|---|---|
| Title | Appointment title or description |
| Case File | Associated case file number (with patient link) |
| Patient Name | Patient's full name |
| Provider | Healthcare provider name |
| Start Date/Time | Appointment start date and time |
| End Date/Time | Appointment end date and time |
| Location | Appointment location/address |
| Modality | Type of service (In-Person, Telehealth, etc.) |
| Status | Current appointment status |
| Type | Appointment type (New Patient, Follow-up, etc.) |
| Created Date | When appointment was scheduled |
| Updated Date | Last modification date |
| Actions | Edit and delete buttons |
Sorting
Click any column header to sort:
- First click - Sort ascending
- Second click - Sort descending
- Third click - Remove sort
Default Sort:
- Case File View: Start Date descending (newest first)
- Global View: Start Date ascending (soonest first)
Filtering
Text Filters
Type in the filter bar below any column to search:
- Title - Search appointment titles
- Case File - Search by file number
- Patient Name - Search by first or last name
- Provider - Search by provider name
- Location - Search by location
- Status - Search by status
- Type - Search by appointment type
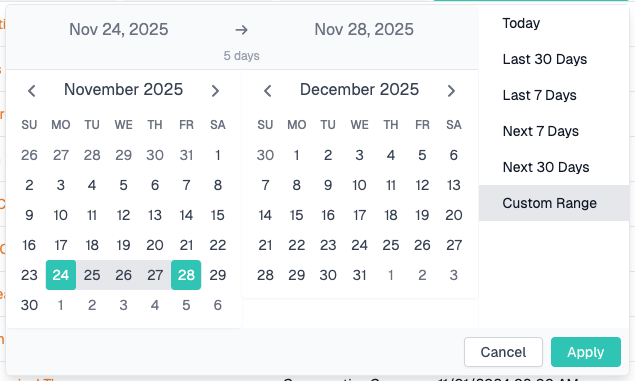
Date Range Filters
Available for:
- Start Date/Time
- End Date/Time
- Created Date
- Updated Date
How to Use:
- Click filter bar under date column
- Date range picker opens
- Select:
- Preset range (Today, This Week, This Month, Last 30 Days, etc.)
- OR Custom date range
- Grid filters automatically
Tip: Date filters are especially useful in global view to see upcoming appointments
Grid Persistence
What Gets Saved:
- Column widths
- Column order
- Column visibility
- Filter values
- Sort order
- View preference (calendar vs grid)
To Reset: Click Clear Filters button in toolbar
Grid Actions
Add Button (Case File View)
- Opens appointment form
- Case file pre-selected
- Start with empty appointment
Edit Button (Row Action)
- Opens appointment form
- Pre-fills all appointment details
- Modify and save changes
Delete Button (Row Action)
- Prompts for confirmation
- Permanently removes appointment
- Cannot be undone
Column Chooser
- Show/hide grid columns
- Customize your view
Creating an Appointment
Opening the Form
From Calendar View:
- Double-click on a time slot
From Grid View:
- Click Add button in toolbar
From Case File:
- Use Add button or double-click calendar
Required Fields
⚠️ Must complete before saving:
- Case File (in global view) - Select case file or create new patient
- Provider - Select healthcare provider
- Start Date/Time - Appointment start
- End Date/Time - Appointment end
- Modality - Service type (In-Person, Telehealth, etc.)
- Appointment Type - Type of visit
- Appointment Status - Current status
- Title - Brief description of appointment
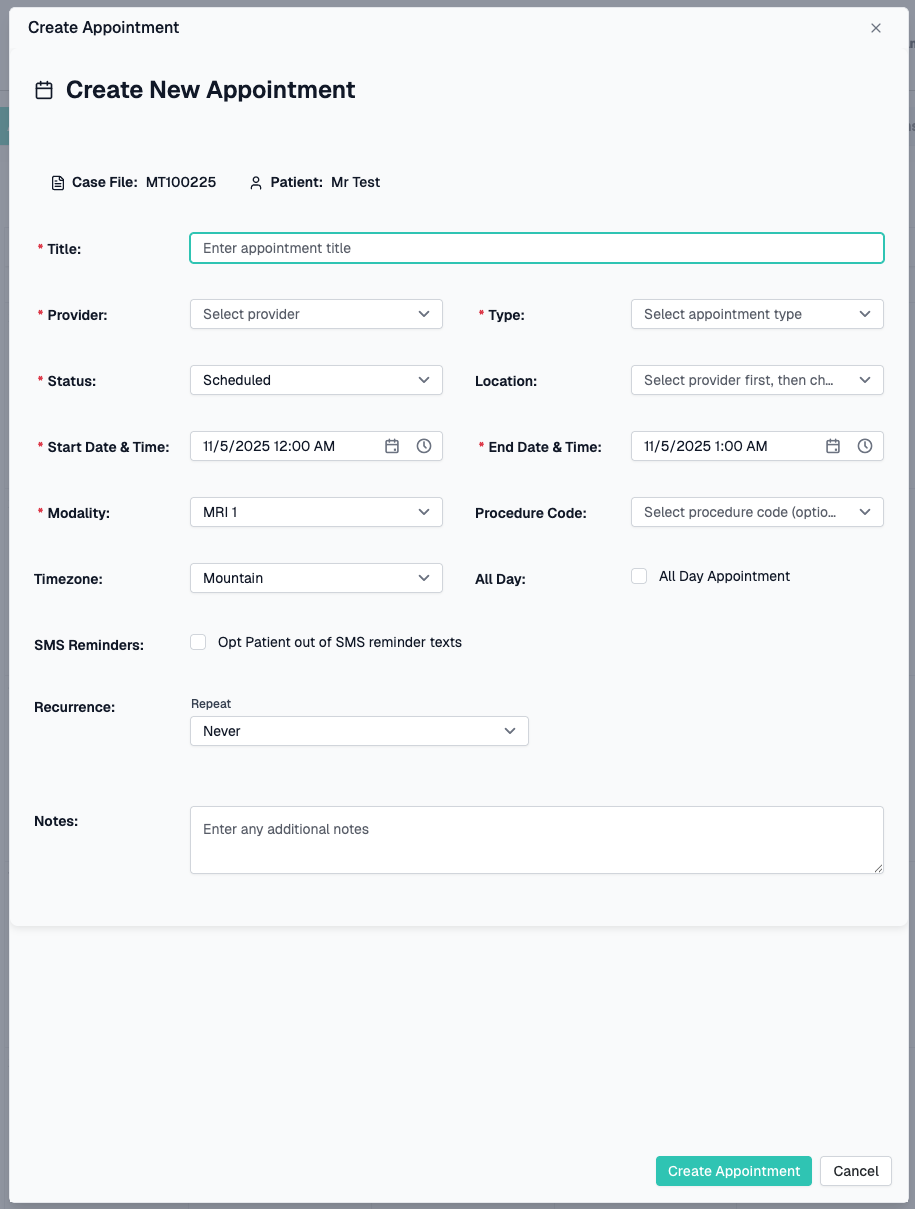
Appointment Form Fields
Basic Information:
| Field | Description |
|---|---|
| Case File | Selected case file (read-only after selection) |
| Patient | Patient name (displayed for reference) |
| Title | Brief appointment description (required) |
| Provider | Healthcare provider (required) |
| Location | Provider's office/facility (based on selected provider) |
| Modality | In-Person, Telehealth, Home Visit, etc. (required) |
Scheduling:
| Field | Description |
|---|---|
| Start Date/Time | When appointment begins (required) |
| End Date/Time | When appointment ends (required) |
| Timezone | Time zone (Pacific, Mountain, Central, Eastern) |
| All Day | Mark as all-day appointment (checkbox) |
Appointment Details:
| Field | Description |
|---|---|
| Appointment Type | New Patient, Follow-up, Consultation, etc. (required) |
| Appointment Status | Scheduled, Confirmed, Completed, Cancelled, etc. (required) |
| Procedure Code | Medical procedure code (optional) |
Recurrence:
| Field | Description |
|---|---|
| Recurrence Rule | Set up repeating appointments |
| Recurrence Editor | Visual editor for repeat patterns |
Additional:
| Field | Description |
|---|---|
| Notes | Additional appointment notes |
| Opt Out SMS Reminder | Disable SMS reminders for this appointment |
Selecting Provider and Location
Provider Selection:
- Click Provider dropdown
- Search or scroll to find provider
- Select provider
- Location dropdown automatically loads provider's locations
Location Selection:
- After selecting provider, locations become available
- Click Location dropdown
- Select from provider's office locations
- Location is optional but recommended
Note: If provider has no locations, location field may be empty
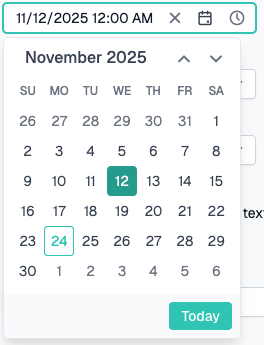
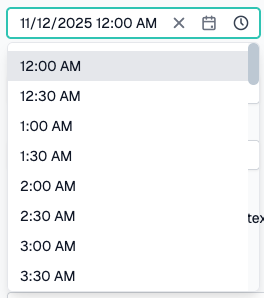
Setting Date and Time
Date/Time Entry Options:
Option 1: Date/Time Pickers
- Click Start Date/Time field
- Calendar and time picker opens
- Select date and time
- Repeat for End Date/Time
Option 2: Pre-filled from Double-Click
- When creating via double-click
- Start and end times are pre-filled
- Duration defaults to 1 hour
- Adjust as needed
All-Day Appointments:
- Check All Day checkbox
- Time fields become disabled
- Appointment shows as full-day event
Recurrence Editor
For Repeating Appointments:
- Scroll to Recurrence section
- Visual recurrence editor displays
- Configure repeat pattern:
- Frequency: Daily, Weekly, Monthly, Yearly
- Interval: Every X days/weeks/months
- Days of Week: Select specific days
- End Date: Until date or after X occurrences
Example Patterns:
- Every week on Monday and Wednesday
- Every 2 weeks on Friday
- First Tuesday of every month
- Every 3 months
Recurrence Rule Preview:
- Shows text representation of pattern
- Example: "Occurs every week on Monday, Wednesday until 12/31/2024"

SMS Reminder Opt-Out
Purpose: Disable automatic SMS reminders for specific patient
How to Use:
- Locate Opt Out SMS Reminder checkbox
- Check to disable SMS reminders
- Patient will not receive automated texts
- Setting applies to this case file going forward
Note: This updates the patient's SMS preference
Submitting the Form
- Review all entered information
- Click Submit button at bottom
- Form validates all required fields
- Appointment is created
- Success message displays
- Calendar/grid refreshes with new appointment
Validation Errors:
If required fields are missing:
- Fields highlight in red
- Error messages display
- Form remains open
- Scroll to errors and correct
Canceling
To cancel without saving:
- Click Cancel button
- Form closes without saving
- Any entered data is lost
Editing an Appointment
Opening for Edit
From Calendar View:
- Click appointment to open quick info
- Click Edit button
From Grid View:
- Click Edit icon in Actions column
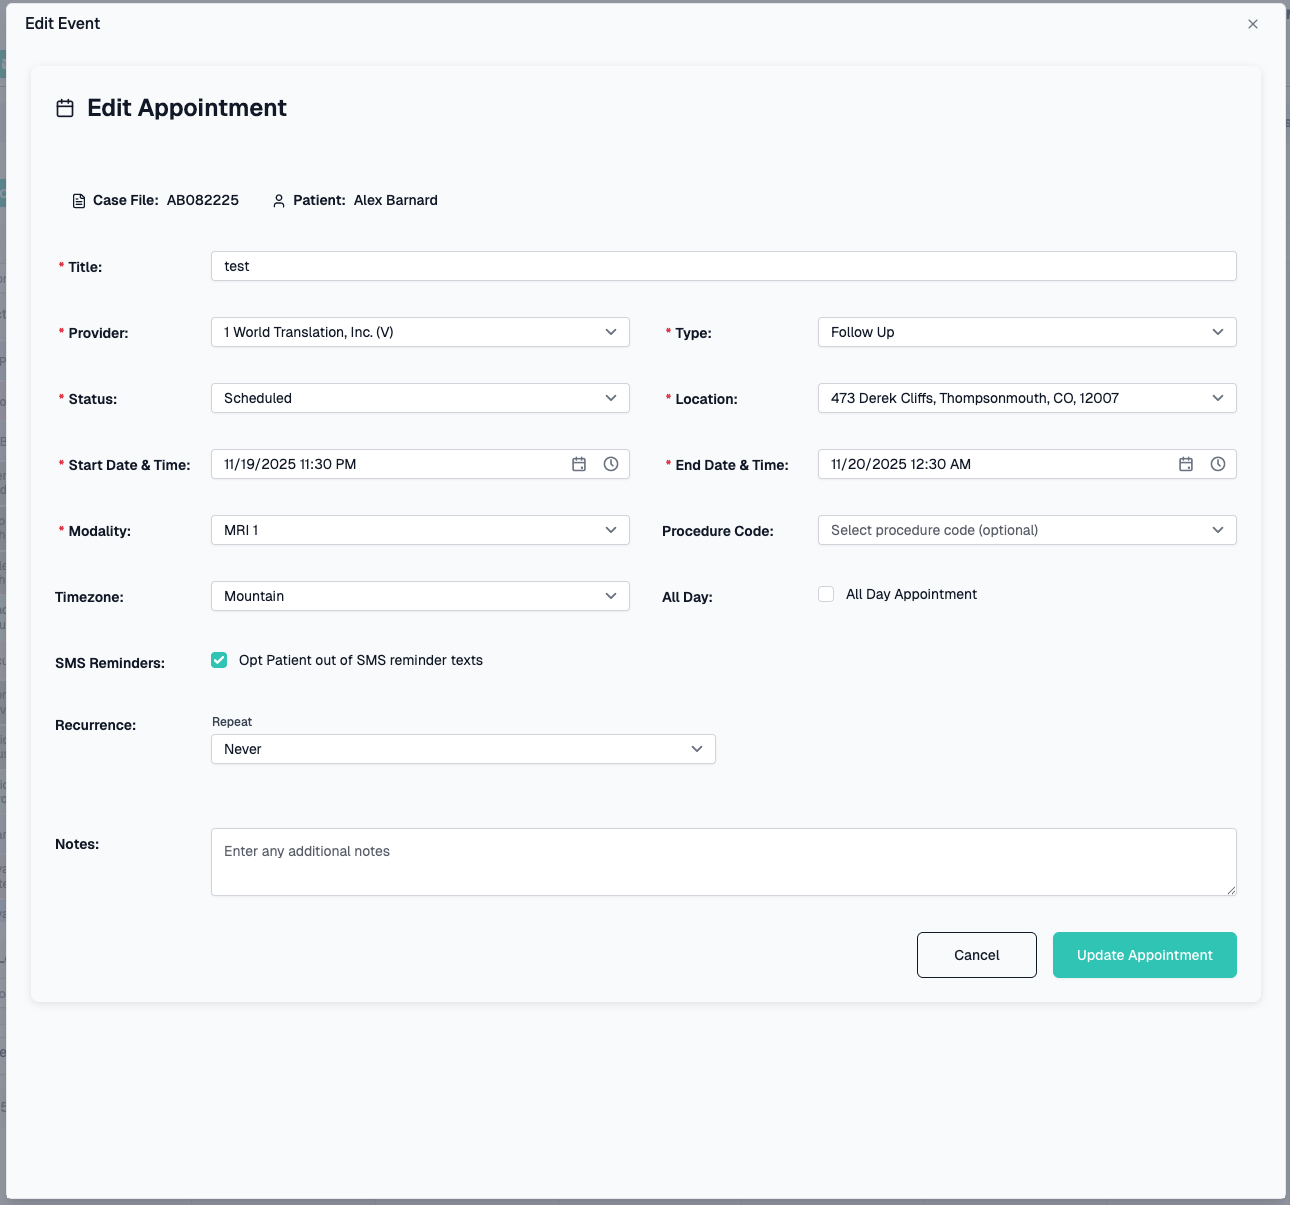
Making Changes
Edit Form Behavior:
- Form pre-fills with existing data
- All fields are editable
- Provider changes reload location options
- Only changed fields are sent to server
Common Edits:
- Change date/time
- Update status (e.g., Scheduled → Completed)
- Add notes
- Change location
- Update provider
Completing an Appointment
To mark appointment as complete:
- Open appointment for edit
- Change Appointment Status to "Completed"
- Add any final notes
- Submit form
- Appointment shows as completed
Canceling an Appointment
Method 1: Change Status
- Open appointment for edit
- Change Appointment Status to "Cancelled"
- Add cancellation notes
- Submit form
Method 2: Delete
- Click Delete button
- Confirm deletion
- Appointment is permanently removed
Creating New Patient from Appointments
Global View Feature: Create patient and case file while scheduling
When to Use
- New patient calling to schedule
- Walk-in appointment
- Referral from provider
- No existing case file yet
How to Create
- Click Add Appointment button (global view)
- In case file selection dialog, click Create New Patient
- Create Patient Mode opens with expanded form:
Patient Information:
- First Name (required)
- Last Name (required)
- Phone Number (required)
- Date of Birth (optional)
-
Date of Loss (optional)
-
Fill in patient information
- Continue with normal appointment form
- Submit form
- Creates:
- New patient record
- New case file
- New appointment
- Links all together
This streamlines intake for new patients with immediate appointments

Common Workflows
Scheduling a New Patient Appointment
- From global appointments view
- Click Add Appointment
- Click Create New Patient
- Enter patient information:
- First and last name
- Phone number
- Date of birth
- Date of loss
- Select provider
- Select location
- Set date and time
- Select modality (In-Person, Telehealth, etc.)
- Select appointment type
- Add title and notes
- Submit form
- Patient, case file, and appointment all created
Scheduling Follow-up Appointment
- Navigate to case file
- Go to Appointments tab/section
- Double-click on calendar date/time
- Form opens with case file pre-selected
- Select provider and location
- Confirm date/time
- Select appointment type (Follow-up)
- Add any notes
- Submit
Rescheduling an Appointment
- Find appointment in calendar or grid
- Click appointment to open quick info
- Click Edit
- Change start and end date/time
- Update status if needed (e.g., "Rescheduled")
- Add note explaining reschedule
- Submit form
- Appointment updates in calendar
Marking Appointment as Completed
- After appointment occurs
- Find appointment in calendar or grid
- Click Edit
- Change Appointment Status to "Completed"
- Add any post-appointment notes
- Submit form
- Appointment marked complete
Creating Recurring Appointments
For Regular Treatment Schedule:
- Create new appointment
- Fill in all required fields
- Scroll to Recurrence section
- In recurrence editor, set:
- Frequency: Weekly
- Days: Monday, Wednesday, Friday
- End date: 3 months from now
- Preview shows: "Occurs every week on Mon, Wed, Fri until [date]"
- Submit form
- All appointments in series are created
Filtering Appointments by Date
In Grid View:
- Click date filter under Start Date/Time
- Select This Week preset
- Grid shows only this week's appointments
- OR select custom date range
- See appointments in specific timeframe
Finding Patient Appointments
In Grid View:
- Use Patient Name filter
- Type patient's last name
- Grid filters to show patient's appointments
- View complete appointment history
- Sort by date to see chronologically
Tips & Best Practices
Scheduling
✅ Book appointments with buffer time - Allow travel or prep time between appointments
✅ Use appointment types consistently - Standardize types for reporting
✅ Add detailed notes - Help staff prepare for appointment
✅ Confirm locations - Ensure correct office for multi-location providers
✅ Set realistic durations - Account for actual appointment length
✅ Use recurrence for regular treatment - Save time on repetitive scheduling
Calendar Management
✅ Use Month view for overview - See long-term schedule
✅ Use Day/Week view for details - Manage daily operations
✅ Color coding helps - Provider colors improve visual clarity (if enabled)
✅ Double-click for speed - Fastest way to create appointments
✅ Copy details - Quick info sharing with staff/patients
Status Tracking
✅ Update statuses promptly - Keep calendar accurate
✅ Mark completed appointments - Track appointment history
✅ Note cancellations - Document why appointment didn't occur
✅ Use Confirmed status - Track which appointments are verified
Grid View Usage
✅ Filter for reporting - Find appointments by criteria
✅ Export to Excel - Analysis and reporting
✅ Sort by date - See chronological history
✅ Patient name filter - Quick patient appointment lookup
Troubleshooting
Cannot Create Appointment in Global View
Possible Causes:
- No case file selected
- Creating on read-only view
Solution:
- Must select case file first
- Or create new patient
- Cannot create appointments without case context
Provider Locations Not Loading
Possible Causes:
- Provider has no addresses in system
- Provider not yet selected
- Data loading issue
Solution:
- Ensure provider is selected first
- Provider must have at least one address
- Location field may remain empty if no addresses
End Time Before Start Time Error
Cause:
- End date/time is set before start date/time
Solution:
- Ensure end date/time is after start date/time
- Check that dates are correct
- For same-day appointments, end time must be later
Recurrence Not Saving
Possible Causes:
- Recurrence rule format error
- End date before start date
- Invalid recurrence pattern
Solution:
- Use recurrence editor (don't manually type rule)
- Ensure end date is after start date
- Check pattern is logically valid
SMS Opt-Out Not Working
Possible Causes:
- Phone number not in system
- SMS service not configured
- Patient already opted out
Solution:
- Ensure patient has phone number
- Check with support about SMS configuration
- Verify opt-out status was saved
Appointment Not Showing on Calendar
Possible Causes:
- Date is outside visible calendar range
- Provider filter is active (if enabled)
- Location filter is active (if enabled)
- Appointment for different case file
Solution:
- Navigate to appointment's date
- Check provider/location filters
- Clear all filters
- Verify correct case file
Cannot Edit Appointment
Possible Causes:
- Insufficient permissions
- Appointment is locked
- Appointment already completed
Solution:
- Check your user permissions
- Contact CaseCompass support
- Completed appointments may have edit restrictions
Double-Click Not Creating Appointment
Possible Causes:
- In global view (requires case file selection)
- Feature disabled
- Calendar locked
Solution:
- In global view, dialog opens to select case file
- In case file view, should open form directly
- Try using Add button instead
Need Help?
If you encounter issues not covered in this guide:
- Contact CaseCompass support via support@casecompass.com
- Provide specific error messages
- Include screenshots if helpful
This guide covers the Appointments page functionality. Features may vary based on your user permissions and system configuration.